
Decision Snapshot
Start With the Short Answer
The tamper is the most tactile, most personal tool in your espresso setup. Tamper Size: This Is Non-Negotiable: Your tamper must match your portafilter basket diameter within 0.5mm.
The tamper is the most tactile, most personal tool in your espresso setup. Every barista develops their own
relationship with it — the weight in their hand, the feel of the flat base seating against the grounds, the
confirmation click of a calibrated spring. But for beginners, tamping is also the most common source of bad shots:
uneven tamps creating channeling, excessive pressure wasting energy without adding extraction benefit, incorrect
sizes leaving rings of unextracted grounds around the basket edge.
This guide covers everything: how to choose the right tamper, how to tamp correctly, and what actually matters (and
what’s marketing noise).
Key Takeaways

Your tamper must match your portafilter basket diameter within 0.5mm. Common basket sizes:
- 51mm: DeLonghi entry-level machines (Dedica, Stilosa)
- 53–53.3mm: Breville Bambino, some compact machines
- 54mm: Breville Barista Express, Pro, Touch
- 58mm: Gaggia Classic Pro, Rancilio Silvia, ECM, Rocket, most prosumer/commercial machines
A tamper that’s too small leaves a ring of uncompressed, loosely packed grounds around the basket edge. Water finds
this ring and channels through it rather than distributing evenly across the puck. Even one millimeter of mismatch
makes a measurable difference in shot consistency.
Calibrated vs Non-Calibrated Tampers
A calibrated (spring-loaded) tamper contains an internal spring mechanism that clicks when you’ve applied a specific
pressure — typically 15lbs, 20lbs, or 30lbs. When the spring engages, you’ve applied consistent pressure regardless
of how strong you feel that day. This click-feedback is invaluable for beginners establishing muscle memory and for
eliminating pressure as a variable when troubleshooting shots.
Non-calibrated tampers are solid, with no moving parts. Experienced baristas who’ve developed consistent technique
often prefer them for their simplicity and the feedback they provide through tactile resistance alone. There’s no
right answer — calibrated is better for beginners, non-calibrated is preferred by many intermediate-to-advanced
users.
How to Tamp Correctly: Step-by-Step
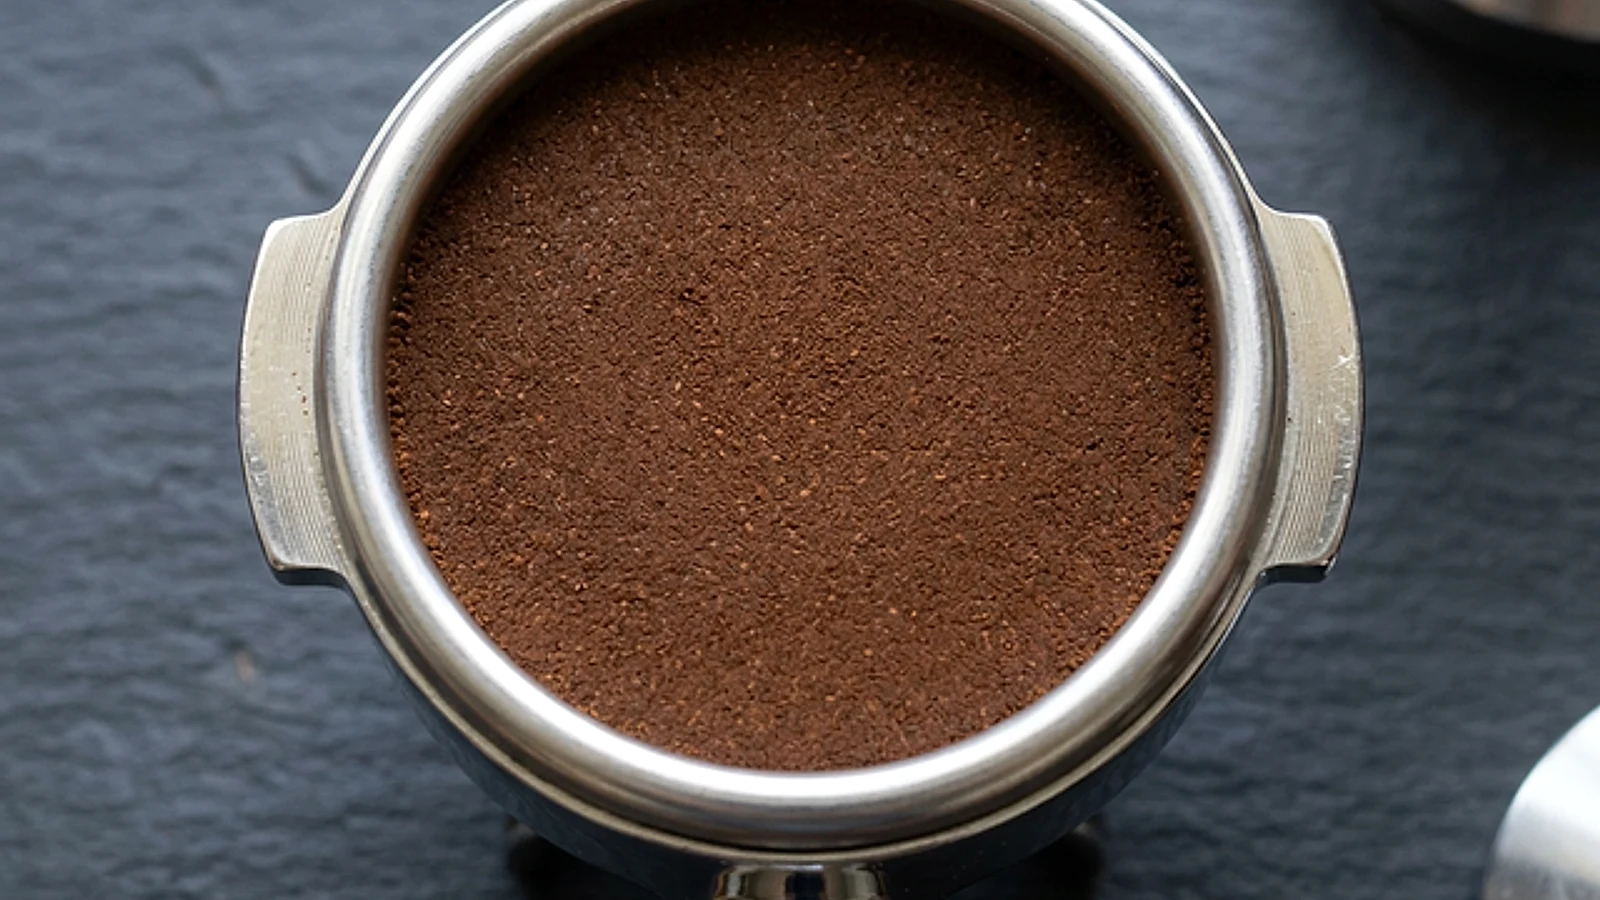
Step 1: Distribute the grounds first
Before tamping, use a WDT tool or leveling distributor to break up clumps and evenly distribute the ground coffee in
the basket. An uneven distribution cannot be fixed by tamping — a tamp compresses whatever distribution you’ve
created, not corrects it.
Step 2: Position the portafilter
Rest the portafilter on a firm, flat surface — ideally a rubber tamping mat. Your forearm, wrist, and the tamper
should form a straight vertical line. Bending your wrist during tamping creates a tilted tamp, which is one of the
primary causes of channeling.
Step 3: Apply pressure straight down
Place the tamper flat on the coffee surface and press straight down with your body weight — not just your arm
strength. This is why the tamping mat and arm alignment matter. Apply 15–30lbs of pressure. Research consistently
shows that pressure above 30lbs produces no additional extraction benefit — the puck density is already sufficient
to resist 9 bars of water pressure.
Step 4: No twist, no polish
The popular “polish” (a twist of the tamper handle after pressing) is a barista affectation, not a functional
technique. It doesn’t improve puck density or evenness. Simply press firmly, lift straight up, and lock in your
portafilter.
Flat vs Convex Tamper Bases
Virtually all modern espresso tampers use flat bases. The flat base creates uniform density from the center to the
edge of the puck. Convex (“bomb”) tamper bases were historically used with older group head designs but are rarely
found or recommended today. Always choose flat.
Handle Materials: Ergonomics, Not Status
Tamper handles come in aluminum, stainless steel, wood, and plastic. The material only matters for grip comfort and
longevity. A heavy handle reduces wrist fatigue during high-volume use. Wooden handles (walnut, rosewood) feel warm
and substantial. Stainless steel handles are the most durable and easiest to clean. Plastic handles are acceptable
but uncommon on quality tampers. Don’t pay extra for exotic materials — pay for the right size and a flat base.
For current live picks and prices, browse the Espresso Insider product hub.
routine and ownership friction
Best Espresso Tamper only becomes clear when you compare what living with each option actually feels like.
Spec sheets hide the parts that annoy you every morning: heat-up rhythm, retention, noise, cleanup, refill direction, and how easy it is to recover from a bad setting move.
I have made the mistake of buying for the headline advantage and then resenting the product because the daily routine felt worse than the small taste gain justified.
That is why we keep comparing these matchups against adjacent cluster guides like our puck prep guide instead of pretending one page can replace the whole ownership decision.
Taste, drink style, and daily routine
Best Espresso Tamper should be judged by the drinks you make most often, not by comment-section mythology.
If your daily coffee is milk-heavy before work, the easier and more forgiving option can honestly be the better buy even if the enthusiast crowd prefers the more demanding tool.
If you chase straight-shot clarity, lower retention, or tighter grind control, then the extra friction can be worth it because the cup changes in a direction you will actually notice.
The mistake is acting like one winner can serve every buyer equally well. Good comparison content should split the audience on purpose.
Upgrade path and long-term fit
Best Espresso Tamper also separates based on what kind of owner you will be six months from now.
Some products stay satisfying because they keep the routine simple. Others stay satisfying because they leave more room to obsess over precision and technique. Those are different kinds of value.
There is no shame in wanting convenience. The bad move is buying the control-heavy option while secretly wanting less management, or buying the easy option while already craving a steeper learning curve.
For more context on that tradeoff, compare the related lessons in our distribution guide and the Espresso Insider product hub.
Which one we would buy and why
Best Espresso Tamper needs a firm buyer split, not a vague tie.
If the routine rewards speed, lower friction, or easier recovery from mistakes, we would pick the simpler option and move on. That is not settling. That is buying for reality.
If the buyer clearly values the extra control or clarity enough to live with the tradeoffs, then the more demanding option becomes the right answer for a very specific reason.
That kind of blunt verdict is what most ranking pages avoid, but it is exactly what readers need when they are choosing with real money.
What changes once you stop reading spec sheets
Best Espresso Tamper: Calibrated vs Flat vs Spring-Loaded makes more sense when you judge it the way an owner would, not the way a forum would.
Spec sheets flatten products into neat boxes, but the lived experience is messier. Warm-up rhythm, dial-in confidence, cleanup friction, and noise can outweigh a headline feature once the routine becomes normal.
That is why we are comfortable being opinionated here. A technically stronger option can still be the wrong recommendation if its daily friction is higher than the payoff for the buyer we are actually talking to.
Good comparison content should help someone spend money with fewer regrets, not just sound balanced on paper.
A realistic one-week ownership verdict
Technical DNA Comparison
Best Espresso Tamper: Calibrated vs Flat vs Spring-Loaded makes more sense when you judge it the way an owner would, not the way a forum would.
After a week, the strengths that looked abstract become obvious. Either the product suits the routine and quietly earns trust, or it starts to feel like another thing you have to manage before coffee.
That is the right time horizon for a comparison verdict. Not the first excited shot, but the moment where you notice whether the routine feels sensible before work on a normal Tuesday.
If a product still feels like the right call at that point, the recommendation has a much better chance of holding up long term.
For a wider technical reference, Barista Hustle is still worth bookmarking. For a second expert reference on espresso technique and calibration language, Barista Hustle remains one of the cleaner resources on the web.
These active catalog matches are the current live listings worth checking while you read this comparison.
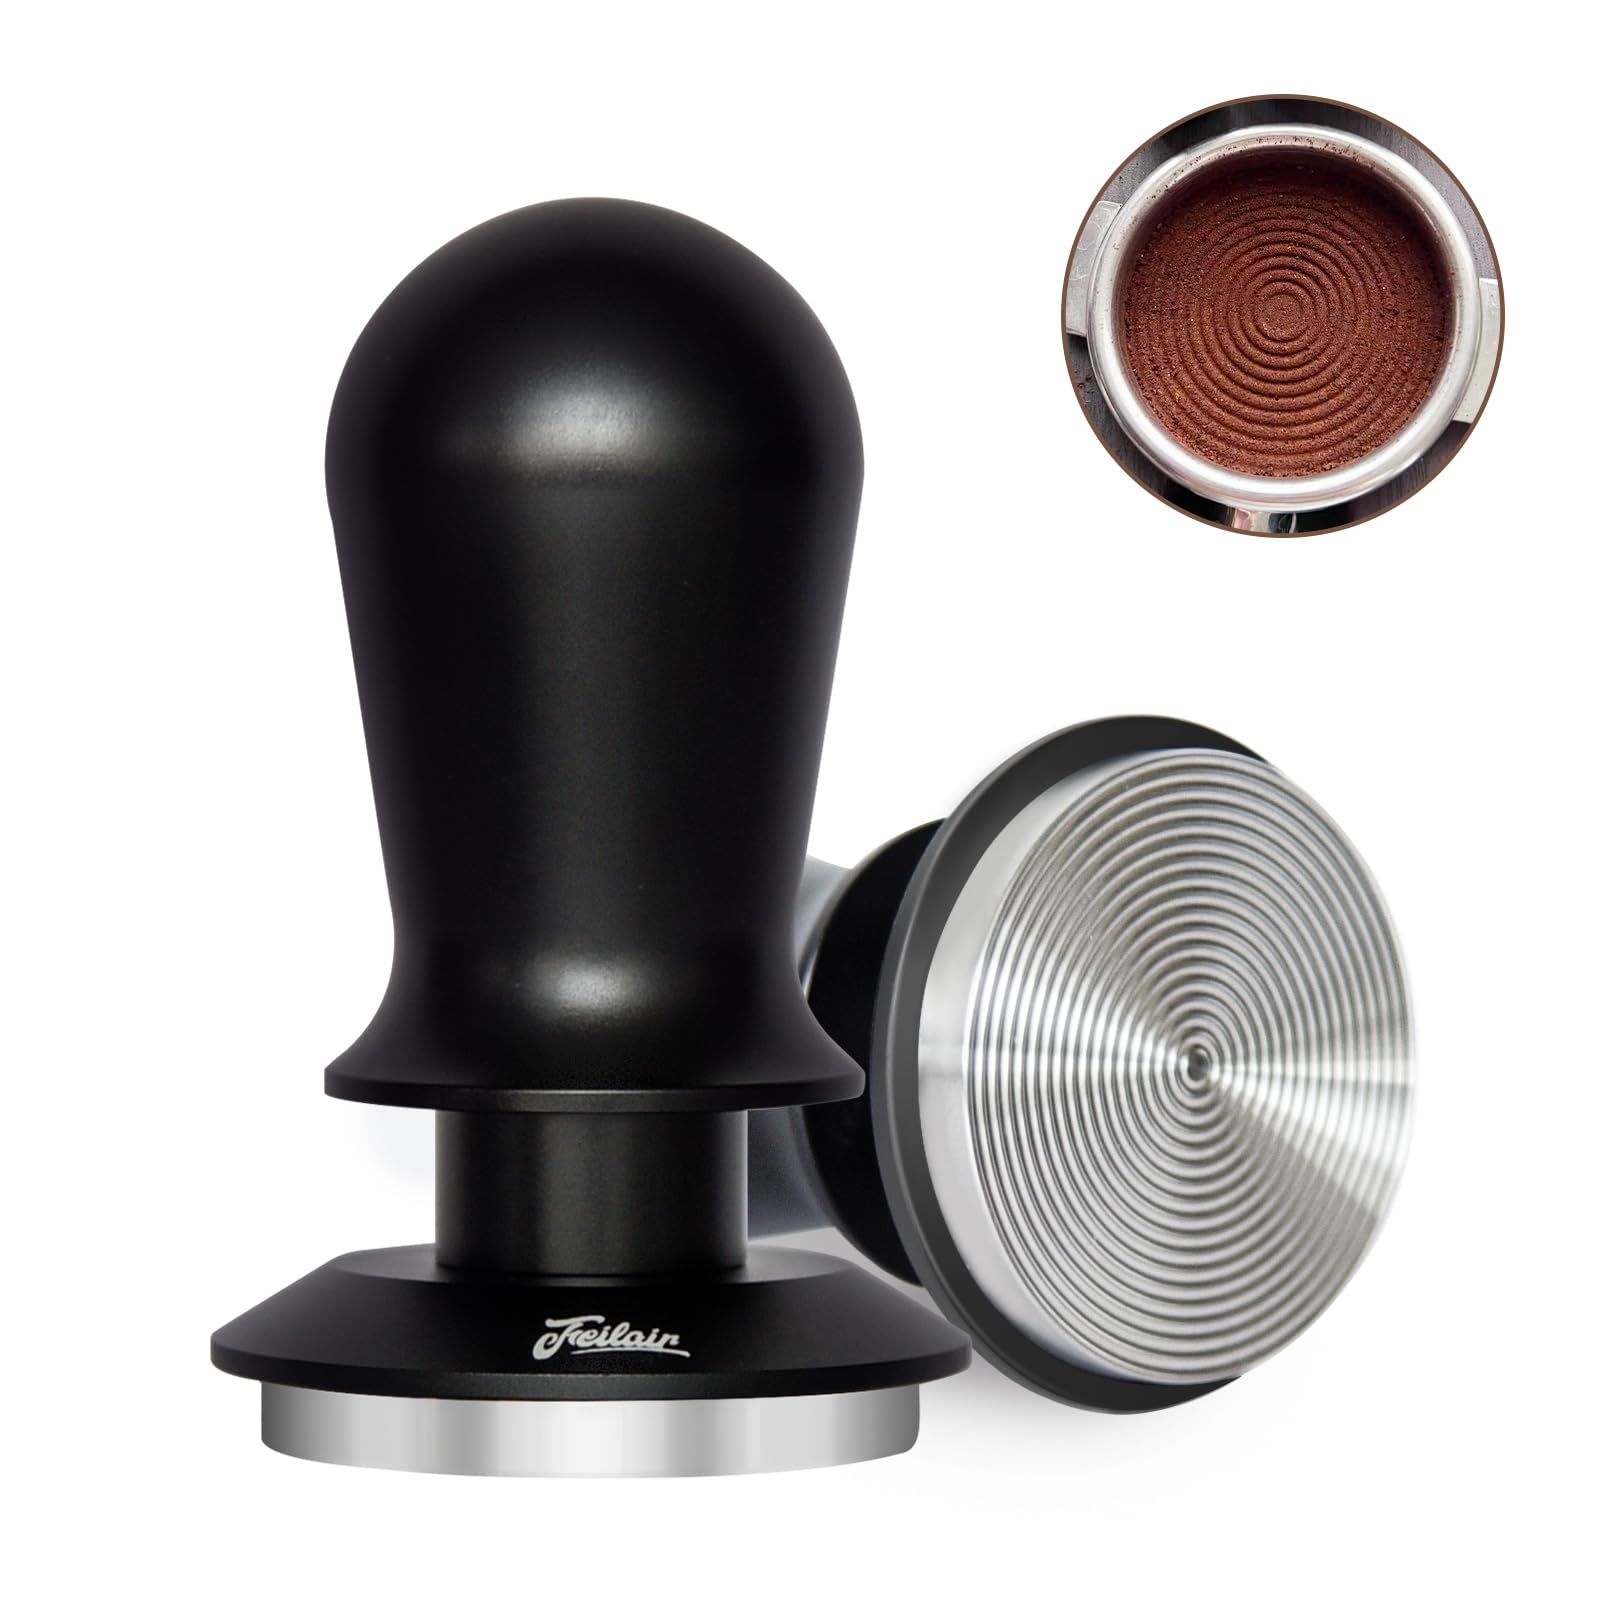
FEILAIR 51mm Calibrated Espresso Tamper
The FEILAIR 51mm calibrated espresso tamper is designed for consistent and precise tamping. Its spring-loaded mechanism delivers a consistent 30lb pressure, indicated by a distinct audible click. The concentric ring…
See Current Offer
KNODOS Calibrated Espresso Tamper 58mm Walnut, Auto-Leveling and 30lb Spring Loaded Design Stainless Steel Ripple Base Coffee Tamper with 20lb / 25lb / 30lbs Replacement Springs (58.3mm)
KNODOS Calibrated Espresso Tamper 58mm Walnut, Auto-Leveling and 30lb Spring Loaded Design Stainless Steel Ripple Base Coffee Tamper with 20lb / 25lb / 30lbs Replacement Springs (58.3mm) is a tampers espresso accessory…
See Current Offer
PUSEE 53mm Espresso Tamper
The PUSEE 53mm espresso tamper is designed for consistent tamping pressure, a critical factor in espresso extraction. Featuring a calibrated spring mechanism, it aims to deliver a consistent 30lbs of force, minimizing…
See Current OfferFrequently Asked Questions
Before You Buy
Narrow the field to 2 to 4 options, compare the practical tradeoffs side by side, then click through to a retailer only after the choice is clear.